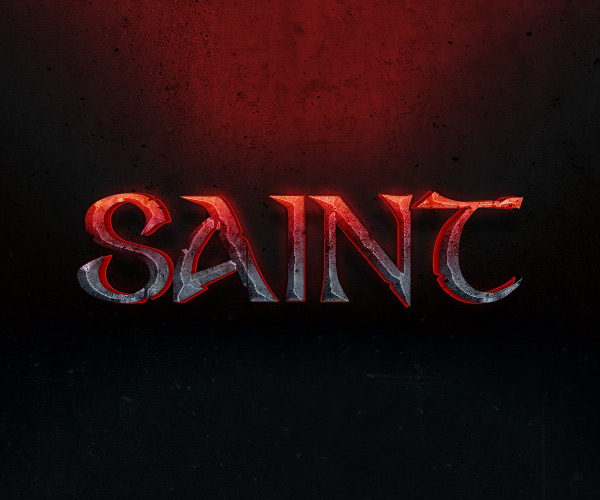
by Enrique Elicabe – Difficulty : Beginner – Length : Short
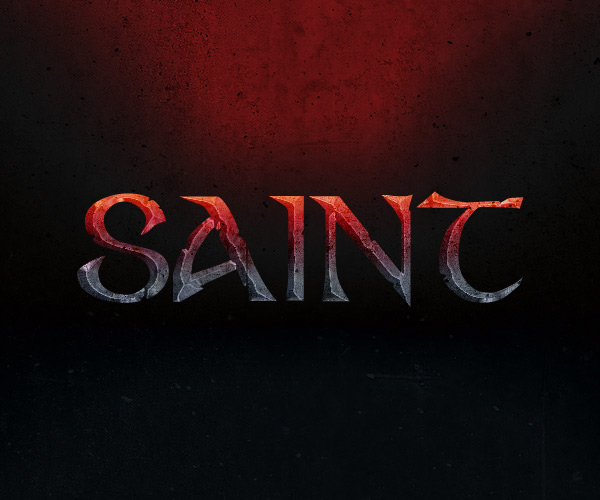
In this tutorial, you’ll learn how to create a hot concrete text effect for movies or poster using two layers to get a central vanishing point in Adobe Photoshop. Let’s get started!
Tutorial Assets:
The following assets were used during the production of this tutorial.
- Pattern: concrete01.pat (zip file)
- Font: Stonecross
1. Creating the Background
Step 1
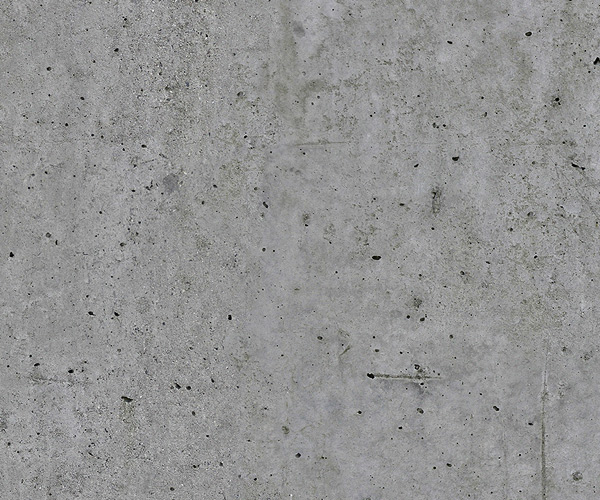
Install the pattern file named concrete01.pat by double clicking it.
Step 2
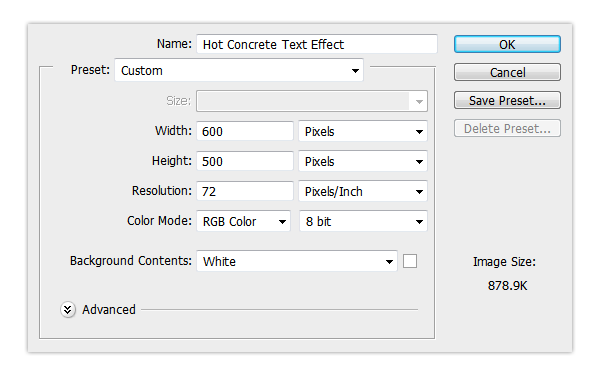
Create a New document (File > New). Set Width to 600 px and Height to 500 px. Resolution must be 72 ppi.
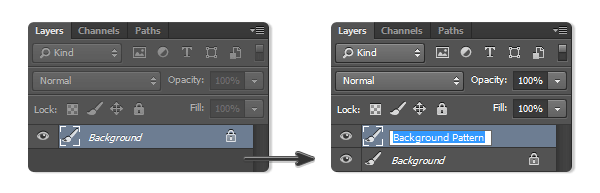
Step 3
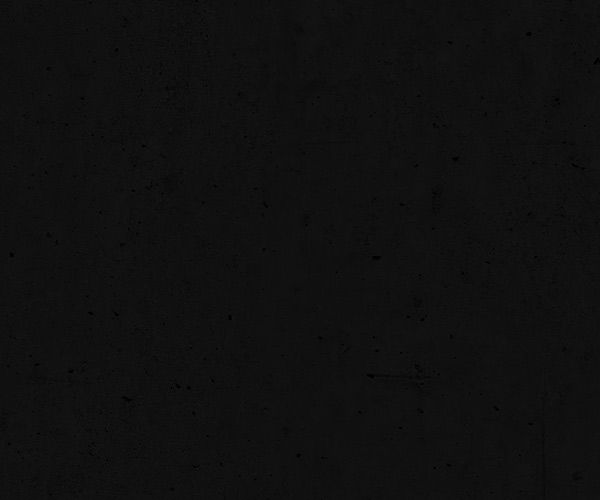
Select the background and duplicate it (go to Layer > Duplicate Layer > OK). Rename the new layer as Background Pattern.
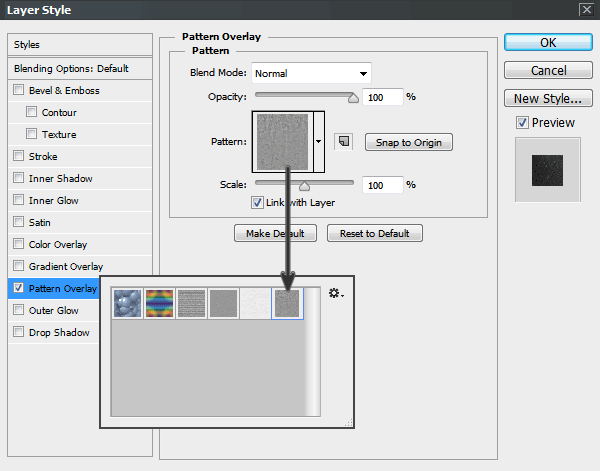
Step 4
To add the texture, go
to Layer and open the Layer Style window. Select the Pattern
Overlay box, choose concrete01.pat
from the list, and then press OK.
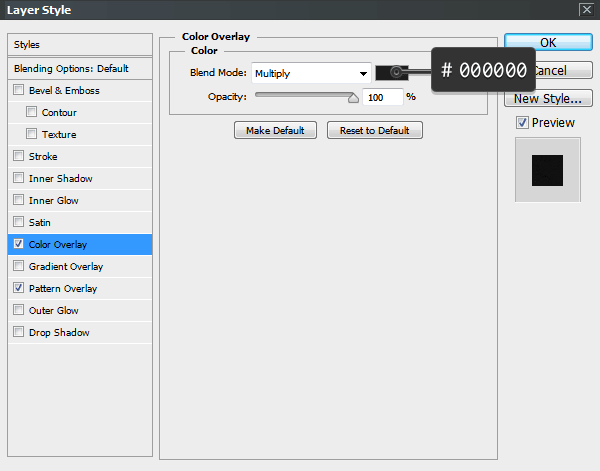
Step 5
Go to Color Overlay inside the Layer Style
panel and apply the following settings.
Step 6
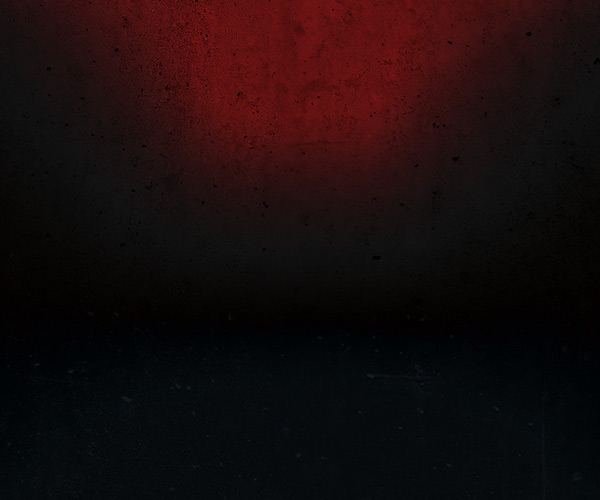
Now we are going to
add the shining red light to create the hot reflected effect in the background.
Go to Layer Style > Bevel &
Emboss and set these values:

2. Creating the Text
Step 1
Type the word Saint or some text of your choice using the Stonecross font. Set the Font Size to 130 pt, Leading to Auto and Tracking to 20 pt. For best quality, change the anti-aliasing mode to Sharp. Rename the layer ‘SAINT a’.
Step 2
Duplicate the text and rename the new layer ‘SAINT b’ as shown below. Hide the ‘SAINT b’ layer to work more comfortably, because we are not going to use this layer yet.

Step 3
Using the Move Tool, select
the two text layers and the background layer, and then click the align commands Align Horizontal Center and Align Vertical Center on the top menu
to center it.
3. Styling the Main Layer
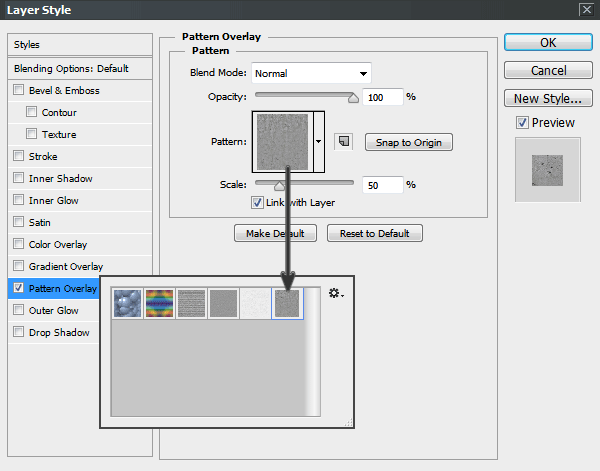
Step 1
Select the SAINT a layer and go to Layer > Layer Style > Pattern Overlay. Click on the Pattern box, choose concrete01
from the list (we are using the same background pattern), and set the Scale to
50%. Now it looks just a little more like real concrete.

Step 2
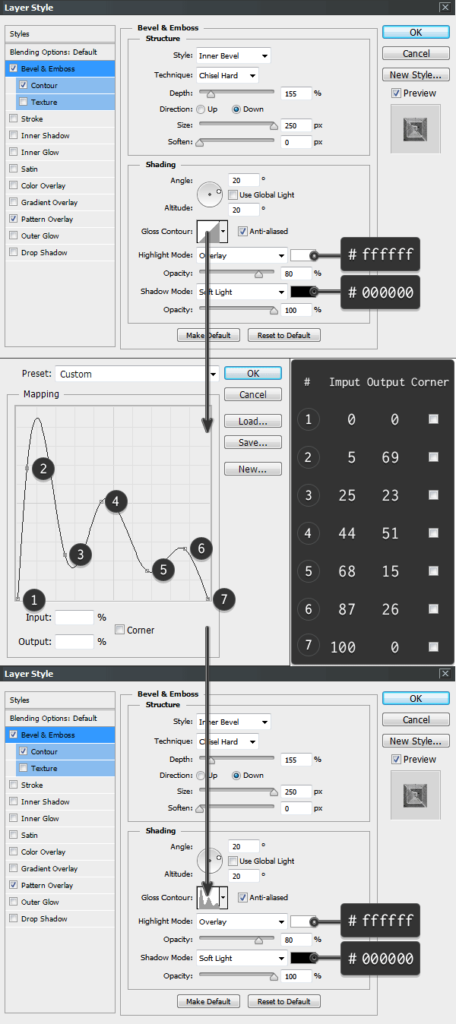
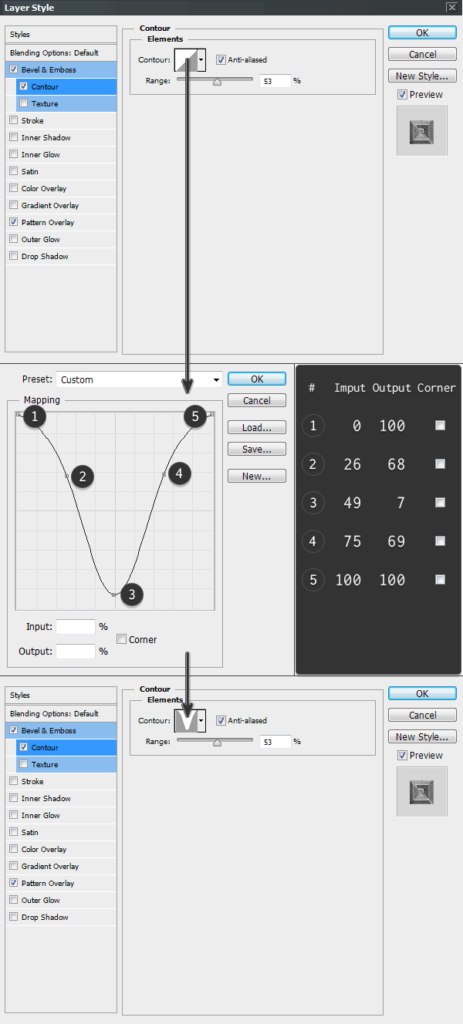
To get the beveled look, go to the Layer Style window andmodify the settings of Bevel & Emboss and Contour as shown below.
You’ll need to create two custom contour curves to get the volume effect. Follow the images carefully and use the values shown in the right column.
Step 3
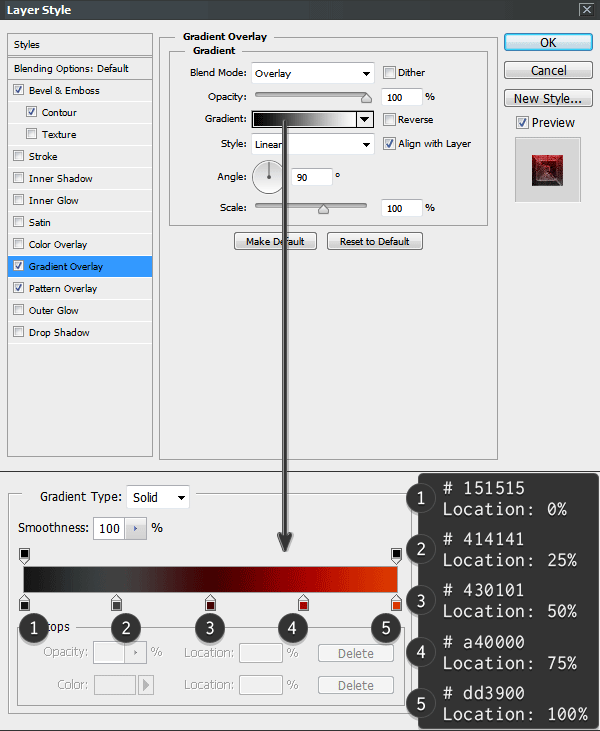
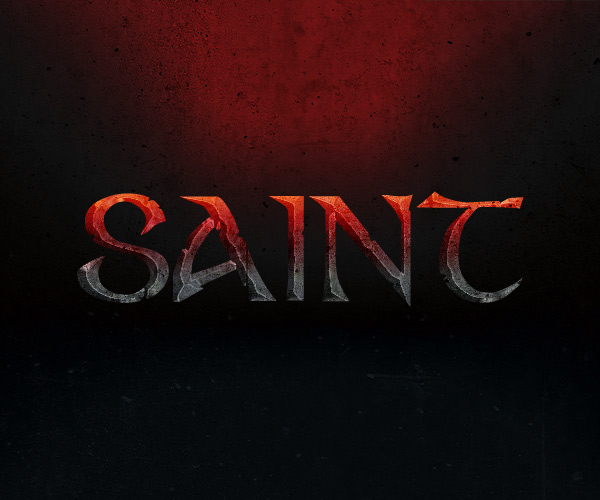
To light up the letters we are going to use a gradient base. Select Gradient Overlay from the Layer Style window and set the values as shown below.
Tip: To create a new point
in the gradient you have to click under the gradient bar. Clicking each one of
the color stops allows you to modify Location and Color.
Step 4
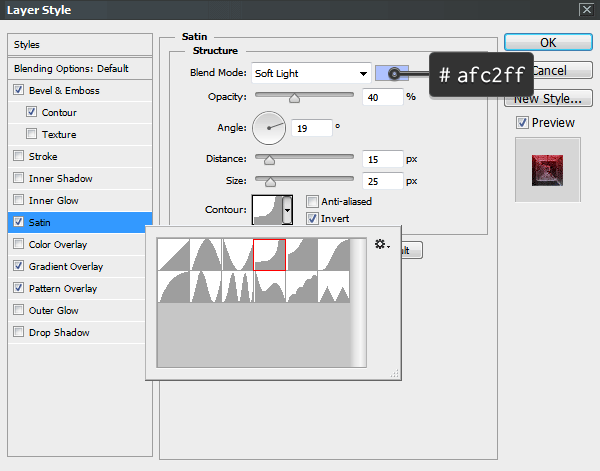
Go to Layer Style > Satin
and use the following settings to brighten up the text.
The Contour is a default curve named Cove – Deep.
Step 5
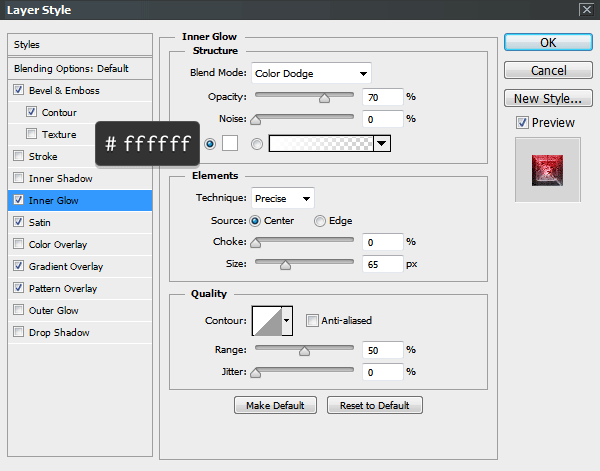
Now we’re going to improve the effect by adding a shiny glow. Go to Layer Style > Inner Glow and set the following values.
Step 6
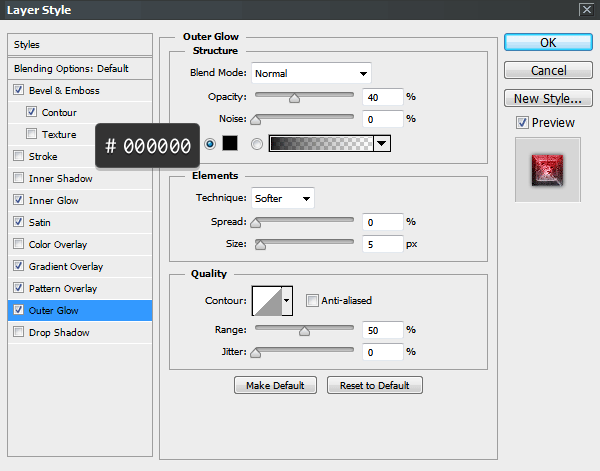
We need to add some shadows to separate the text from the background. Go to Layer Style > Outer Glow and use the settings shown below.

4. Styling the Second Layer
Step 1
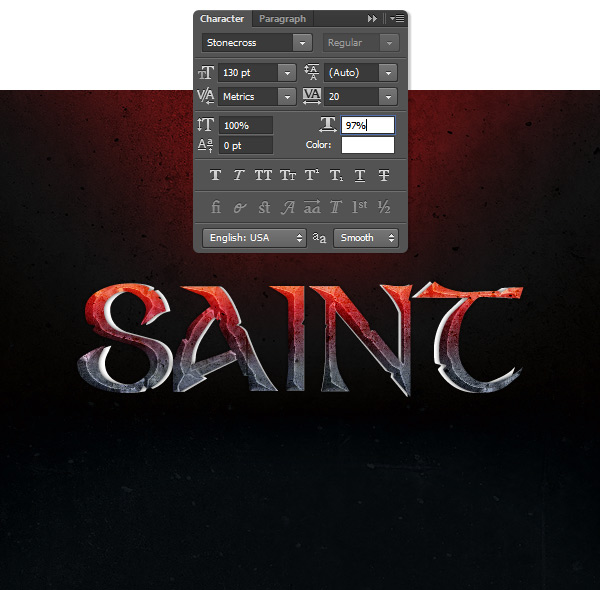
Now we’re going to work with the secondlayer named ‘SAINT b’, so make sure you turn it on! In this step we have to achieve a perspective with a central vanishing point. Go to the Character window and change the Horizontally Scale value to 97% as shown below.
Step 2
Go to Layer > Layer Style > Pattern Overlay and select the concrete01 pattern from the box to match both layers’ texture. Set the Scale to 50%.
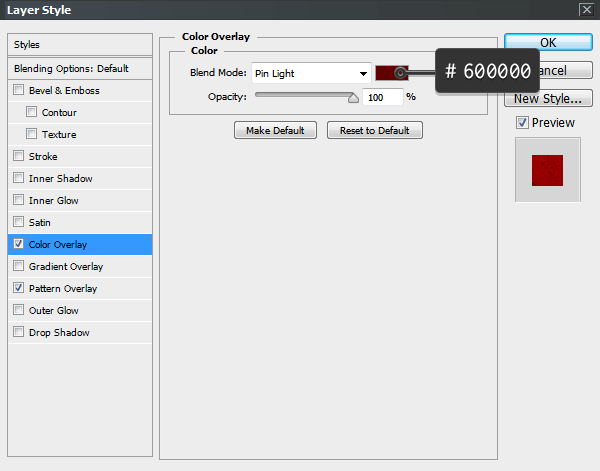
Step 3
To get the burning edges color you have to go to Layer Style and modify Color
Overlay using the following values.
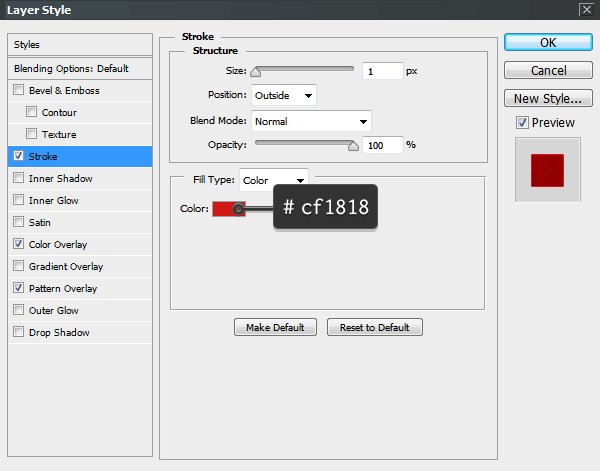
Step 4
Select Stroke from the Layer Style window, and set the Position as Outside and Fill Type as Color, with the value shown below.

Step 5
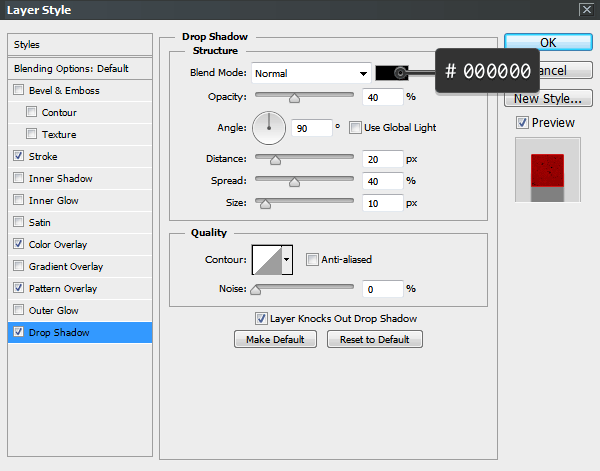
We are going to add some shadows to separate the text from the background. Go to Layer Style > Drop Shadow and use the values shown in the image below.
Step 6
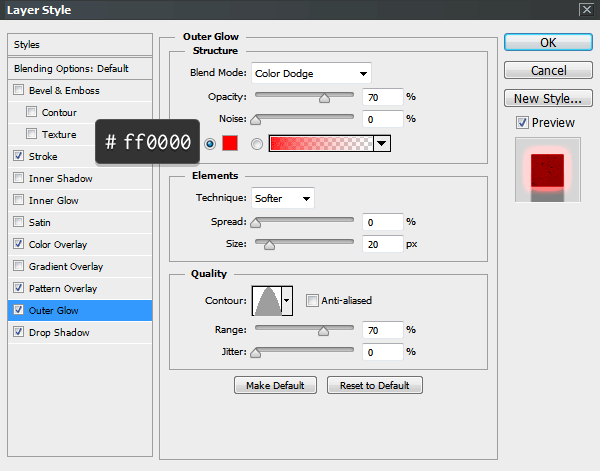
In this final step we are going to emphasize the hot edges by adding Outer Glow. Go to Layer Style > Outer Glow and modify the following settings. The Contour is a default curve named Cone.

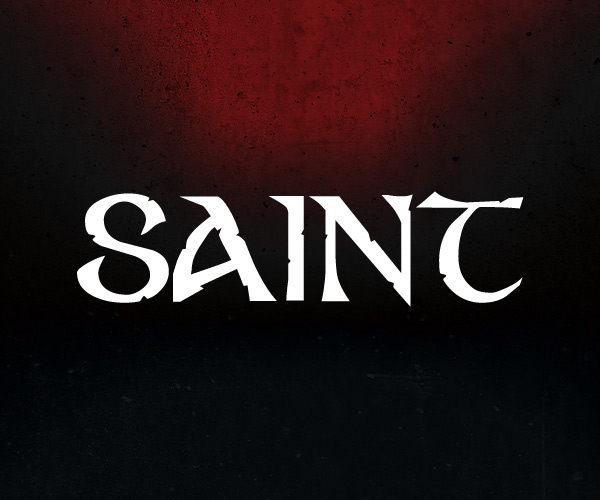
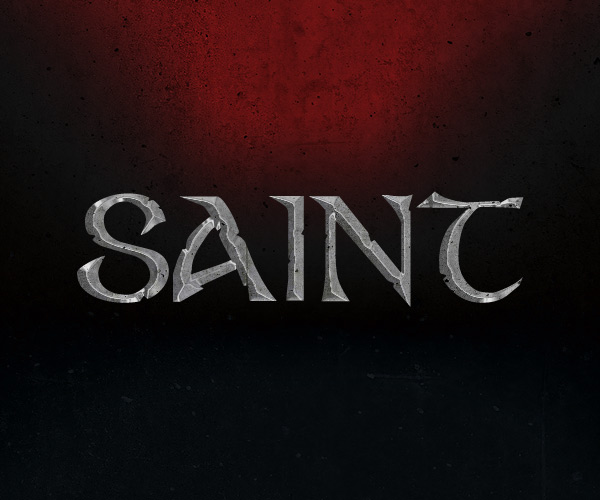
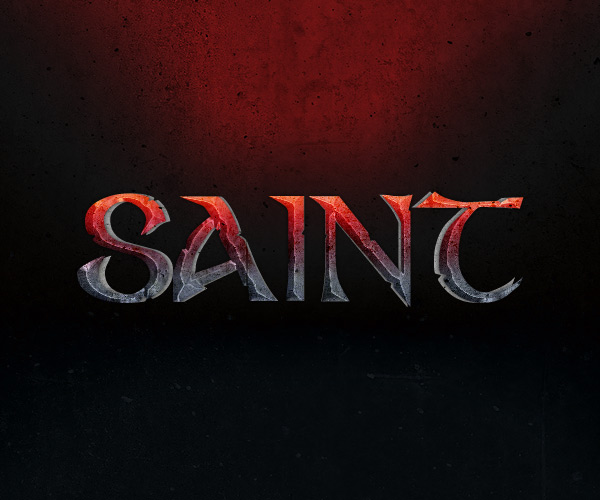
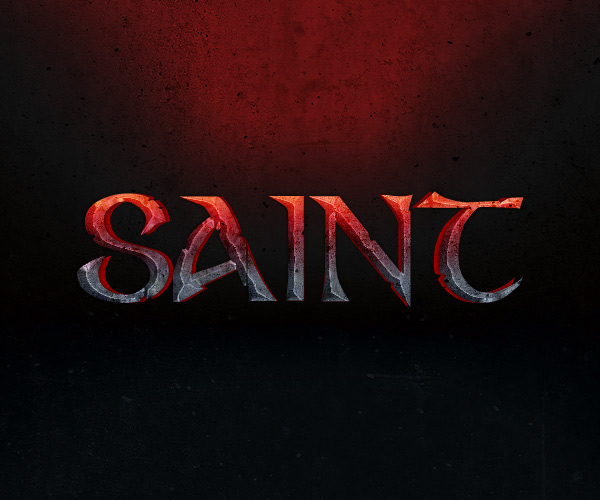
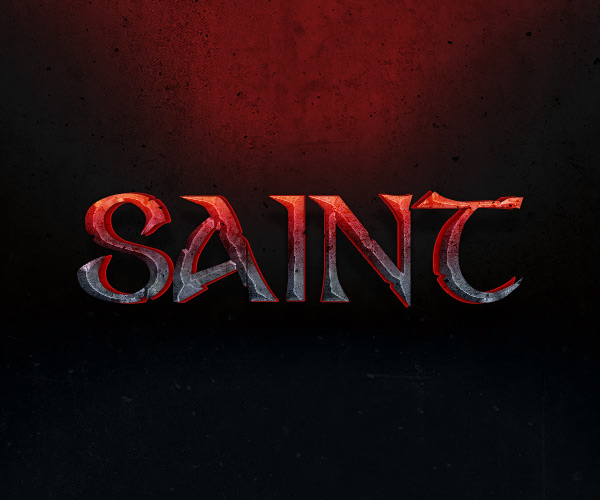
Great Job, You’re Done!
In this tutorial I showed you how to create a hot concrete text effect using a real texture and two layers to achieve a central vanishing point.
Source : design tutsplus