
Use Photoshop shortcuts to speed up your workflow with tips that cover layering, text, viewing and image handling.
Photoshop shortcuts are the answer to simple tasks taking forever. Fiddly extra steps can be an issue when using Photoshop, slowing down your workflow and taking up valuable brain space. Photoshop pros use shortcuts to solve the problem.
We’ve found the best shortcuts on the web and collated them here for your Photoshop pleasure. They’ll help you to change the size of your text, deselect a layer or merge a series of layers with swift ease. We also have useful hints for brushes, saving and closing, and viewing options. They are all guaranteed to speed up your process once you get the hang of them.

Manipulating and arranging layers is simple with these great Photoshop shortcuts
01. Show and hide the layers panel
- WINDOWS: F7
- MAC: F7
Quickly show and hide the Layers panel easily by pressing F7 on your keypad. This will also show and hide the Channels and Paths panels because they are grouped together.
02. Scroll through the Layers
- MAC: Option [ ]
- WINDOWS: Alt [ ]
To scroll through the layers quickly, hold Alt/Option and use left and right bracket keys [ ] to scroll through: right is up and left is down.
03. Create New layer
- MAC: Shift+Cmd+N
- WINDOWS: Shift+Ctrl+N
Get started on your latest project in next to no time with this handy shortcut that instantly whips up a new layer and dialogue box.
04. Create new layer behind selected layer
- MAC: Ctrl+New Layer icon
- WINDOWS: Cmd+New Layer Icon
Mastering the new layer shortcut is a doddle, so once you’re ready to drop in a layer behind it, be sure to use this shortcut.
05. Fill a layer
- MAC: Alt+Backspace (foreground) or Cmd+Backspace (background)
- WINDOWS: Alt+Delete (foreground) or Ctrl+Delete (background)
This command will fill an empty later with the current foreground or background colour.
06. Flatten layers
- MAC: Cmd+Alt+Shift+E
- WINDOWS: Ctrl+Alt+Shift+E
Add a new, empty layer to the top of your stack, select it and use the above command to flatten the layers in an image to sharpen the result. This adds a flattened version of the image to the new layer but leaves the stacked layers intact too.
07. Merge visible layers
- MAC: Cmd+Shift+E
- WINDOWS: Ctrl+Shift+E
This command enables you to merge all your existing layers to create one new layer. Beware! Once merged, they’re extremely difficult to separate.
08. Stamp down selected layers
- MAC: Cmd+Alt+E
- WINDOWS: Ctrl+Alt+E
Once you’ve selected your layers, use this command to merge them into just one layer. To see them merged as a new layer, simply add in the Shift modifier. This is useful if you need to make adjustments later on.
09. New layer via copy
- MAC: Cmd+J
- WINDOWS: Ctrl+J
Use this command to create a new layer from an existing one. Sound complicated? Give it a go!
10. New layer via cut
- MAC: Cmd+Shift+J
- WINDOWS: Ctrl+Shift+J
Like creating a new layer via copy, this command will create a new layer with the selected image area in it. The only difference via cut is that it will remove the selected image portion from the original image.
11. Bring layer to top of stack
- MAC: Cmd+Shift+]
- WINDOWS: Ctrl+Shift+]
Here, you can move your preferred layer to the top of the stack of images you’re working with in Photoshop.
12. Send layer to bottom of stack
- MAC: Cmd+Shift+[
- WINDOWS: Ctrl+Shift+[
Yep, this is pretty self-explanatory. It does exactly the same as the command above, but in the opposite direction.
13. Bring layer forward
- MAC: Cmd+]
- WINDOWS: Ctrl+]
This Photoshop shortcut enables you to bring any selected image to the front.
14. Send layer back
- MAC: Cmd+[
- WINDOWS: Ctrl+[
If you decide to change your mind, you can always select the image and send it to the back of the pile.
15. Copy multiple layers
- MAC: Shift+Cmd+C
- WINDOWS: Shift+Ctrl+C
Draw a selection, then use this command to take every layer into the clipboard, rather than just the current layer selection.

Adding, subtracting, inverting. Getting selections right has never been easier
16. Reselect
- MAC: Cmd+Shift+D
- WINDOWS: Ctrl+Shift+D
This is a great command for when you accidentally click away from a section. Pressing these keys will have that section reselected in no time.
17. Invert selection
- MAC: Cmd+Shift+I
- WINDOWS: Ctrl+Shift+I
Select objects around a pre-selected image. This way, you can work around your main focus without losing it.
18. Select all layers
- MAC: Cmd+Opt+A
- WINDOWS: Ctrl+Alt+A
A perfect command for those times when you need to get everything in sync.
19. Select bottom layer
- MAC: Opt+,
- WINDOWS: Alt+,
This will select the bottom layer in the Layers panel.
20. Select top layer
- MAC: Opt+.
- WINDOWS: Alt+.
This will select the top layer in the Layers panel.
21. Deselect from the selection area
- MAC: Opt+drag
- WINDOWS: Alt+drag
If you need to deselect a certain area sharpish, then hit these keys and drag your mouse.
22. Deselect all but the intersected area
- MAC: Shift+Opt+drag
- WINDOWS: Shift+Alt+drag
If you don’t want to deselect an area, you can use this shortcut to ensure you’re clicking on what you want.
23. Deselect the entire image
- MAC: Cmd+D
- WINDOWS: Ctrl+D
If you need to get away from the image, use this Photoshop shortcut to deselect anything that you’ve clicked on.
24. Find the sizing handles
- MAC: Cmd+T, then Cmd+0
- WINDOWS: Ctrl+T, then Ctrl+0
When pasting a layer or selection into a Photoshop image and it’s bigger than the current image, it can be difficult to find the sizing handles. This command selects Transform and sizes the image inside the window so you can see the sizing handles.
25. Move a selection
- MAC: Spacebar+Marquee tool
- WINDOWS: Spacebar+Marquee tool
Want to move a selection easily? Simply choose the Marquee tool, and press and hold the Spacebar. Continue to do so until the selection is in the correct place.
26. Select individual channels
- MAC: Cmd+3 (red), 4 (green), 5 (blue)
- WINDOWS: Ctrl+3 (red), 4 (green), 5 (blue)
Selecting with Photoshop Channels makes removing a complex object from the background much easier than using other tools. And using this Photoshop shortcut makes the process even simpler.
27. Select a colour from an image
- MAC: Opt+Brush tool
- WINDOWS: Alt+Brush tool
When working with a Photoshop brush, if you want to sample a colour from an image, instead of clicking the Eyedropper tool, simply hold the Alt or Option key to switch temporarily. Then let go to return to the Brush tool.

Play with brush sizes and more with these great Photoshop shortcuts
28. Increase/decrease brush size
- MAC: ]/[
- WINDOWS: ]/[
Getting your brush size just right is one of the most important aspects of Photoshop. Do it with this command.
29. Fill
- MAC: Shift+F5
- WINDOWS: Shift+F5
Whether you want to fill the selection with the foreground colour or with a selected pattern, use this Photoshop shortcut to get the job done quickly.
30. Increase/decrease brush hardness
- MAC: }/{
- WINDOWS: }/{
Brush hardness is just as important, so get it right with this shortcut.
31. Previous/next brush
- MAC: ,/.
- WINDOWS: ,/.
Save time and distractions by using these simple commands to swiftly move through the various brushes on offer.
32. First/last brush
- MAC: </>
- WINDOWS: </>
If you don’t want to have go through the entire array of Brushes on offer, hit these commands to go back to the start or end.
33. Toggle airbrush option
- MAC: Shift+Opt+P
- WINDOWS: Shift+Alt+P
Simulate spraying painting with Photoshop’s Airbrush tool using this helpful shortcut.
You’ll save most things. So these Photoshop shortcuts should come in handy.
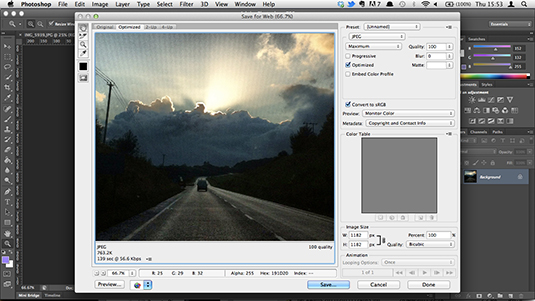
34. Save for web & devices
- MAC: Cmd+Shift+Opt+S
- WINDOWS: Ctrl+Shift+Alt+S
Pretty self-explanatory, but if you prefer not to drag your mouse onto a number of options, use this Photoshop shortcut on your keyboard.
35. Close and go to Bridge
- MAC: Cmd+Shift+W
- WINDOWS: Ctrl+Shift+W
As the name implies, this will close your document and then open up Adobe Bridge, where you can select the next file you wish to work on.

We love Clipping Masks. Does that make us weird? DOES IT?! Ok. Fair enough
36. Levels
- MAC: Cmd+L
- WINDOWS: Ctrl+L
When editing your images, you’ll be using the Levels box regularly. Save yourself some time with this Photoshop shortcut.
37. Free Transform
- MAC: Cmd+T
- WINDOWS: Ctrl+T
This command opens Photoshop’s Free Transform tool for resizing, rotating, and skewing an image using a draggable outline.
38. Curves
- MAC: Cmd+M
- WINDOWS: Ctrl+M
This Photoshop shortcut enables you to quickly edit the Curves on an image.
39. Colour Balance
- MAC: Cmd+B
- WINDOWS: Ctrl+B
This is the perfect Photoshop shortcut to edit the Colour Balance of your images.
40. Hue/Saturation
- MAC: Cmd+U
- WINDOWS: Ctrl+U
These two powerful Photoshop tools will aid you in the colour balance battle, and decrease the amount of crossover.
41. Desaturate
- MAC: Cmd+Shift+U
- WINDOWS: Ctrl+Shift+U
Convert your colour image to grayscale values, leaving the image in the same colour mode.
42. Quick image fixes
Auto Tone
- MAC: Shift+Cmd+L
- WINDOWS: Shift+Ctrl+L
Auto Contrast
- MAC: Opt+Shift+Cmd+L
- WINDOWS: Alt+Shift+Ctrl+L
Auto Color
- MAC: Shift+Cmd+B
- WINDOWS: Shift+Ctrl+B
After a quick fix for a photo? While they’re not reliable cure-alls, these tools are usually worth a go for automatically improving your images.
43. Lens correction
- MAC: Shift+Cmd+R
- WINDOWS: Shift+Ctrl+R
The camera always lies, particularly where lens distortion is involved. Use the lens correction filter to reduce the effect of barrel distortion, pincushion distortion and vignetting.
44. Adaptive Wide Angle
- MAC: Opt+Shift+Cmd+A
- WINDOWS: Opt+Shift+Ctrl+A
Wide-angle lenses can bring their own particular distortions, and Photoshop has a filter for this. The Adaptive Wide Angle filter can quickly straighten lines that appear curved in panoramas, or photos taken with fish-eye and wide-angle lenses.
45. Camera Raw Filter
- MAC: Shift+Cmd+A
- WINDOWS: Shift+Ctrl+A
With older versions of Photoshop you have to run Adobe Camera Raw as a separate program. But in Photoshop CC it’s available as a filter, enabling you to non-destructively apply sophisticated adjustments to any image type.
46. Content Aware Scale
- MAC: Cmd+Shift+Opt+C
- WINDOWS: Ctrl+Shift+Alt+C
Scale your image to your preferred state with this super-quick Photoshop shortcut.
47. Content-Aware Move
- MAC AND WINDOWS: Shift+J
The latest content-aware tool in Photoshop CC enables you to move objects around in a photograph, and it’ll intelligently fill in the gaps where they used to be.
48. Create clipping mask
- MAC: Cmd+Opt+G
- WINDOWS: Ctrl+Alt+G
A great way to keep shadows and shading where they belong, the clipping mask tool is basic but useful.
49. Blending modes
- MAC: Shift++ or –
- WINDOWS: Shift++ or –
Photoshop has a variety of blending modes to create cool effects. Use this command to cycle through each.
50. Black and white dialogue box
- MAC: Shift+Cmd+Opt+B
- WINDOWS: Shift+Ctrl+Alt+B
Speed up the process of converting colour photos to black and white with this Photoshop shortcut, which opens the black and white adjustment dialogue box.
51. Change image size
- MAC: Cmd+Opt+i
- WINDOWS: Ctrl+Alt+i
Set up your image sizes with ease with this quick and simple shortcut.

Speed up your 3D work with these Photoshop shortcuts
52. Show/Hide polygons
Within Selection
- MAC: Opt+Cmd+X
- WINDOWS: Alt+Ctrl+X
Reveal All
- MAC: Opt+Shift+Cmd+X
- WINDOWS: Opt+Shift+Ctrl+X
If you’re working with 3D assets, use this option to view the polygons that make up your 3D models.
53. Render
- MAC: Opt+Shift+Cmd+R
- WINDOWS: Alt+Shift+Ctrl+R
Once you’re happy with your 3D model, use this Photoshop shortcut to create a final render and create the highest quality version for output to web, print, or animation.
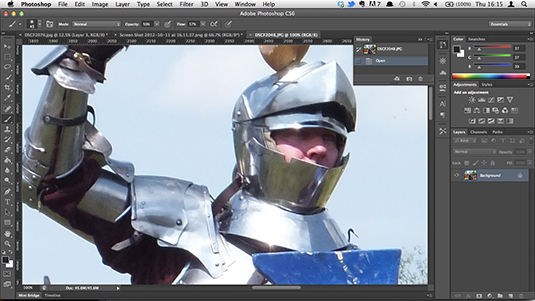
Just how sharp is that pic of a knight? Only one way to tell: CMD+OPT+0, baby!
54. View actual pixels
- MAC: Cmd+Opt+0
- WINDOWS: Ctrl+Alt+0
Viewing an image in Photoshop in actual pixels gives you the chance to see each pixel individually – ensuring your work is perfect.
55. Fit on screen
- MAC: Cmd+0
- WINDOWS: Ctrl+0
This Photoshop shortcut is a great way to view your work in all its glory on screen.
56. Zoom in
- MAC: Cmd++
- WINDOWS: Ctrl++
If you want to get down to the nitty gritty of an image, zoom right in with this Photoshop shortcut command.
57. Zoom out
- MAC: Cmd+-
- WINDOWS: Ctrl+-
Get an insight into how your work will look from afar with this zoom out command.
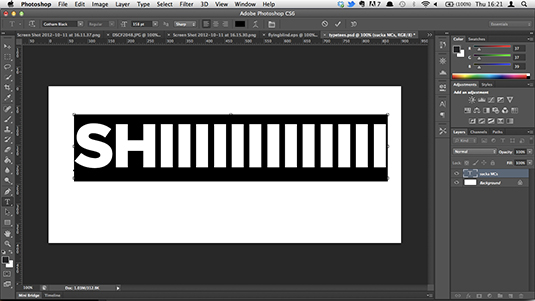
Text options are a pain to find in Photoshop, because everyone uses these
58. Increase/decrease size of selected text by 2pts
- MAC: Cmd+Shift+>/<
- WINDOWS: Ctrl+Shift+>/<
Experiment with text in Photoshop by using this command to change its size by 2pts.
59. Increase/decrease size of selected text by 10pts
- MAC: Cmd+Option+Shift->/<
- WINDOWS: Ctrl+Alt+Shift+>/<
This Photoshop shortcut works the same as the command above, but it’s by 10pts this time.
60. Increase/decrease kerning or tracking
- MAC: Opt+right/left arrow
- WINDOWS: Alt+right/left arrow
Adjust the space between your text in Photoshop with this handy keyboard command.
61. Align text left/centre/right
- MAC: Cmd+Shift+L/C/R
- WINDOWS: Ctrl+Shift+L/C/R
A great way to experiment with the alignment of your text, this Photoshop shortcut will enable you to do it quickly.
62. Show/Hide selection on selected type
- MAC: Cmd+H
- WINDOWS: Ctrl+H
Speed up the process of selecting elements on type with this easy-to-remember shortcut.
————————————–
Via